


OpenVPN is a powerful and flexible VPN solution that allows you to secure your internet connection and ensure privacy. This guide will walk you through the step-by-step process of setting up an OpenVPN server on a Windows machine and configuring it for secure, remote access.
STEP 1: Download OpenVPN
Begin by downloading the latest version of OpenVPN for Windows from the official website:

STEP 2: Install OpenVPN Server on Windows
- Run the Setup File:
- Launch the OpenVPN installer.
- Choose the option to Customize the installation.

- Customize the Installation:
- Expand the OpenVPN Service option by clicking the plus button (
+) and select Will be installed on local hard drive. - Similarly, expand the OpenSSL Utilities option and select Will be installed on local hard drive.
- Proceed with the installation by clicking Install Now.
- Expand the OpenVPN Service option by clicking the plus button (


STEP 3: Create Certificates and Keys for the Server
- Open CMD with Administrator privileges:
- Navigate to the directory
'C:\Program Files\OpenVPN\easy-rsa\' - Run EasyRSA-Start.bat script:

- Delete the default configuration of OpenVPN:
./easyrsa clean-all

- Initialize a database and directory structure for the Public Key Infrastructure (PKI):
./easyrsa init-pki

- Create a Certificate Authority (CA) without a pass:
./easyrsa build-ca nopass
Name your CA (e.g.,server1.local).
- Create certificates and keys for an OpenVPN server:
/easyrsa build-server-full Server nopass


- Initialize Diffie-Hellman Parameter for secure key exchange:
./easyrsa gen-dh
STEP 4: Configure OpenVPN server
- Create a new folder called `Server-Config-Files` on desktop
- Copy the following files from the Easy-RSA directory to the
Server-Config-Filesfolder:
-
ca.crt(fromC:\Program Files\OpenVPN\easy-rsa\pki\)dh.pem(fromC:\Program Files\OpenVPN\easy-rsa\pki\)
Server.crt(fromC:\Program Files\OpenVPN\easy-rsa\pki\issued\)
Server.key(fromC:\Program Files\OpenVPN\easy-rsa\pki\private\) These are all of the copied files we have stored

3. Create a configuration file for the OpenVPN server called Server.ovpn
port 1194
proto udp
dev tun
ca ca.crt
cert Server.crt
key Server.key
dh dh.pem
server 10.10.0.0 255.255.255.0
ifconfig-pool-persist ipp.txt
keepalive 10 120
push "route 10.10.0.0 255.255.255.0"
push "dhcp-option DNS 8.8.8.8"
push "dhcp-option DNS 8.8.4.4"
push "redirect-gateway def1"
comp-lzo
persist-key
persist-tun
status openvpn-status.log
verb 3
If you’re running your OpenVPN server and want to allow all clients to access each other, you can follow these steps:
Edit the OpenVPN Server Configuration File
- Add the following line to server.ovpn:
client-to-client
- This directive allows the clients to communicate with each other through the VPN.

4. Copy all configuration files and folders of `Server-Config-Files` and paste on
C:\Program Files\OpenVPN\easy-rsa\pki\private\
C:\Program Files\OpenVPN\config-auto\
5. Enable the IPEnableRouter option to allow client to access the Internal LAN
- Open the Registry Editor by typing
regeditin the Run dialog (Win + R). - Navigate to
Computer\HKEY_LOCAL_MACHINE\SYSTEM\CurrentControlSet\Services\Tcpip\Parameters. - Set the value of
IPEnableRouterto1.
 |
|
6. Configure Internet sharing between LAN and VPN tunnel
Go to Network and Sharing Center and set up internet connection sharing between your LAN and the VPN tunnel interface.


7. Adjust the firewall to allow port 1194 /udp
- Open Windows Defender Firewall.
- Under Inbound Rules, create a new rule to allow UDP traffic on port 1194.
- Name the rule “OpenVPN” and save it.


STEP 5: Create a Client Profile
- Generate Client Certificates and Keys:
- Create the client’s certificate and key using the following command:
./easyrsa build-client-full Client1 nopass

- Confirm the process when prompted.
- Create the client’s certificate and key using the following command:
- Create a Client Configuration Directory:
- On your desktop, create a folder named
Client-Config-Files.
- On your desktop, create a folder named
- Copy Client Certificates and Keys:
- Copy the following files to the
Client-Config-Filesfolder:ca.crt(fromC:\Program Files\OpenVPN\easy-rsa\pki\) |
|Client1.crt(fromC:\Program Files\OpenVPN\easy-rsa\pki\issued\)
Client1.key(fromC:\Program Files\OpenVPN\easy-rsa\pki\private\)
- Copy the following files to the
STEP 6: Set Up the OpenVPN Client
- Now send these files to the client machine.

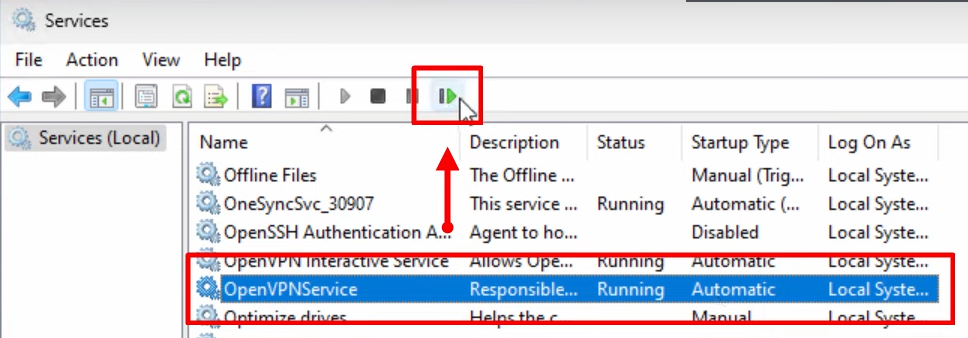
- Restart OpenVPN service to apply the changes
 Navigate to OpenVPNService and restart.
OpenVPN server configuration on Windows is complete.
Now move to a Windows client machine to perform the test. - Download and install OpenVPN on the client similar to the process on the server. (In Step 2)
- Create a configuration file for the OpenVPN server called client.ovpn
client
dev tun
proto udp
remote Your-Public-IP-Address 1194
resolv-retry infinite
nobind
persist-key
persist-tunca ca.crt
cert Client1.crt
key Client1.keycomp-lzo
dhcp-option DNS 8.8.8.8
dhcp-option DNS 8.8.4.4verb 3Create a configuration file for the client

Save it as Client.ovpn in Client-Config-Files folder
- Copy all the files to the C:\Program Files\OpenVPN\config directory

- Configure the firewall to allow traffic through port 1194/UDP
Go to Windows Defender Firewall and select Outbound Rules and create a New Rule. Select Port > UDP and use port 1194
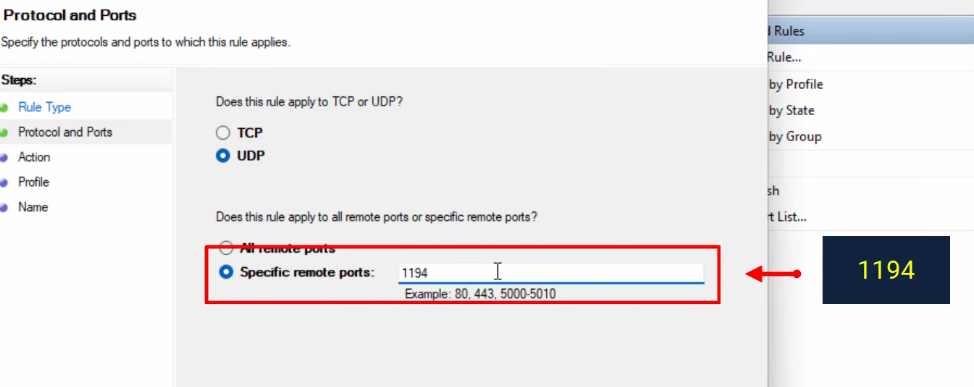
Allow this connection for the port.

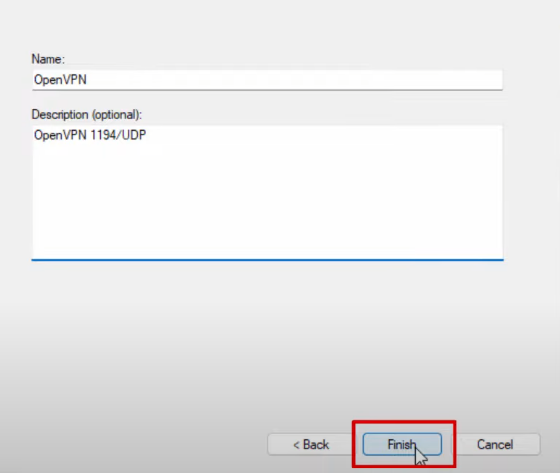
Write OpenVPN in name and click on finish.

Now you Are Successfully connected to the server.

You can create as much clients profile as you want for multiple user access.
Disclaimer: This blog is for educational purposes only, promoting awareness of ethical hacking and cybersecurity to help readers protect against cyber threats. All content is based on lawful experiments on our own systems. No illegal activities are endorsed. Users agree to apply the information responsibly and legally. The blog and author are not liable for any misuse. By using this blog, you agree to use all knowledge ethically and legally. [Read full disclaimer].


